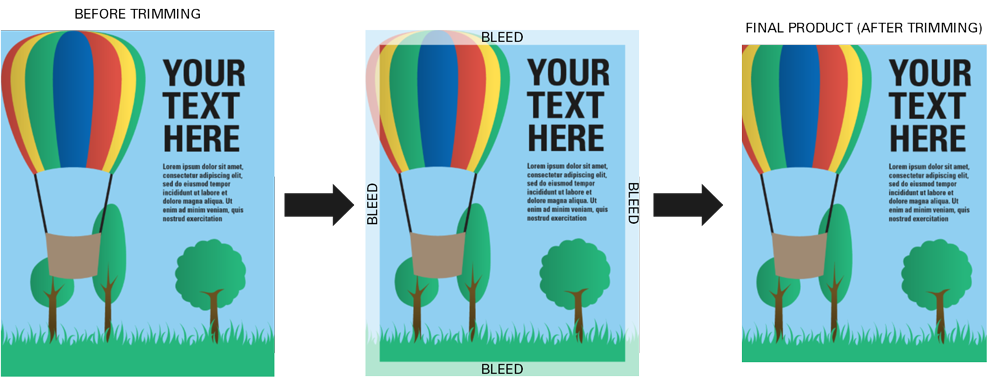
A bleed is the effect achieved when a background goes to the edge of a piece of printed material. This could include any photos, patterns, or colors.
A bleed is achieved by extending the background (and any other elements that bleed) beyond a printed piece’s edges. The extra is then trimmed off. Typically, an extra .125” (1/8-inch) is included for trimming to achieve a bleed.
For example, an 11 x 17 poster that bleeds should be designed with an extra .125” on each side, making the actual printed size 11.25” x 17.25” . The extra .125” on each side is then trimmed after printing, leaving the final 11 x 17 poster with a bleed.
Tricks to creating a printed piece with a bleed:
- Set your page size to be 1/4" taller and 1/4" wider than the final size. It may be necessary to create a custom page size.
- Keep in mind that 1/8" from each side will be trimmed off the final piece, so plan accordingly.
- Leave an adequate margin from the edges for trimming. 1/4" from the trimmed edge is recommended. This means 3/8" from where the bleed starts. A larger margin is always okay!
| Tip! Like Illustrator, InDesign, and Scribus, some programs allow you to set a bleed "margin" without needing to change your actual page size. |
If you have any questions, contact Print & Copy Services at print@pugetsound.edu or 253.879.3737.